

At a dinner party, I made heaps of food including a huge pot of lala soup. The pot of soup was supposed to be something fast and easy to make, amongst other food that took more time e.g fried chicken.
While cooking it took me no more than 10 minutes, cleaning the clams took a lot time and effort. I washed it the only way I knew: soak the clams in salt, wash and drain many times. Still it wasn’t clean enough. And that was the downfall to a perfectly delicious dish.
The Internet is divided on how to clean them – some merely ask to be soaked in fresh water for 20 minutes or adding black pepper into water. What is more reliable than the Internet? A reputable chef. Riccardo Ferrarotti, chef and director of Bottega Mediterranea, who once showed me how to make a super delicious seafood soup gave some tips.
I also did some research by reading some books and extensive Googling (Yes, I am determined to never leave the tiniest morsel of sand in my lala dish ever again). This is what I gathered:
UNDERSTANDING CLAMS
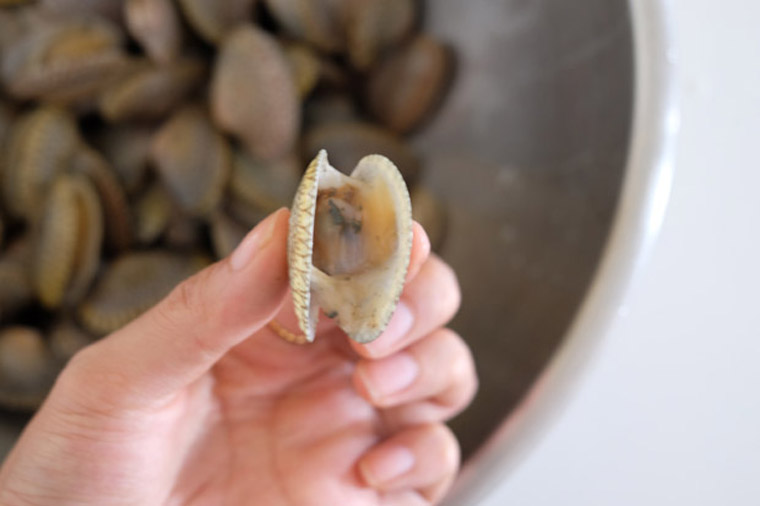
Clams – like oysters and mussels – are in the molluscs family. It is wrapped in two shells, and dig themselves in the ocean or river bed. That explains why the interior of the clams is sandy.
According to Chef Riccardo Ferrarotti, the best way to clean clams is to soak them in a saltwater solution that mimics the sea; sea water contains roughly 28.0 g of NaCl (salt) per litre.
CHOOSING CLAMS
1. Type
In our supermarkets, there are two popular types of clams: lala, a regional clam, and Manila clams which have thicker shells. The latter is widely farmed because it’s robust and lives in shallow burial. The Internet did mention that farmed variety may be less sandy as they are cleaned beforehand. However, I am not sure if it’s applicable in Malaysia.
2. Colour
The fishmonger told me that the lighter the clams, the better. The one is the photo is not bad but I’ve bought lighter.
3. Looks
Choose clams that are alive; otherwise, they already began to spoil. A healthy clam is one with a shell that is closed, indicating the muscle is active and holds the shell tightly together. They should not be opened or chipped.
tldr: Choose light coloured clams with whole and tightly closed shell.
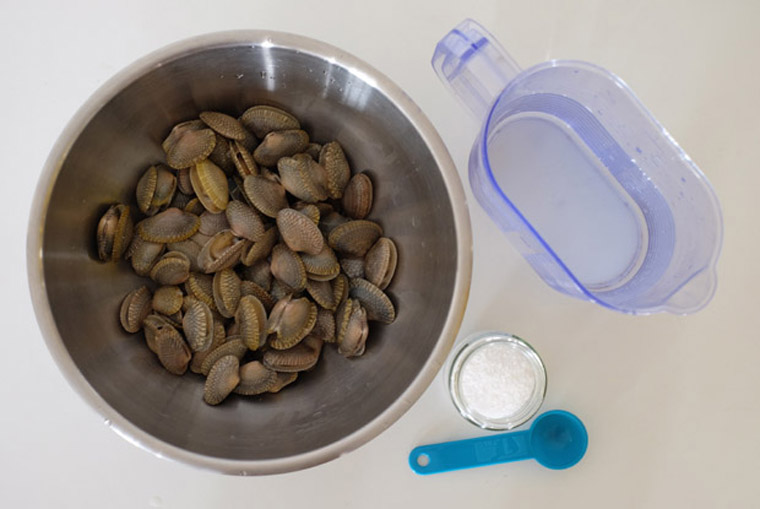
MATERIALS
- 500 g clams
- 1 litre of water
- 28 g (about 2 tbsp) sea salt
- Tablespoon/ electronic weighing scale
- Large mixing bowl
HOW TO REMOVE SAND FROM CLAMS
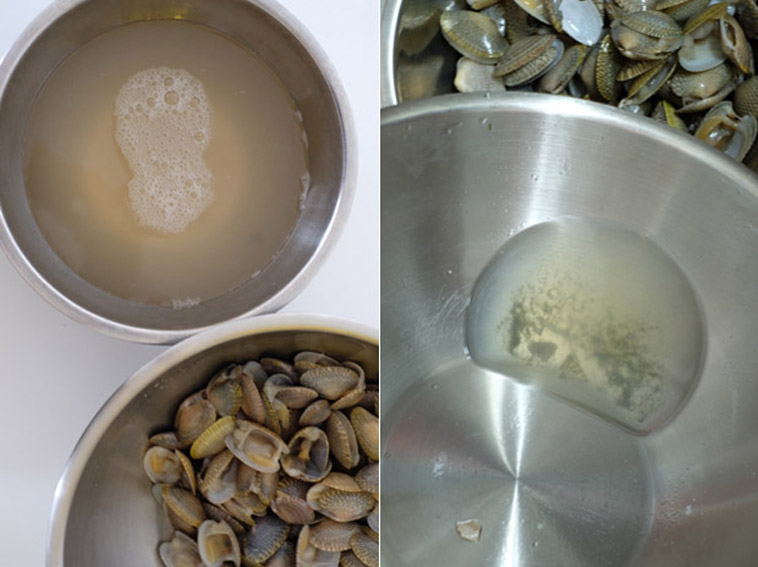
- Pour 1 litre of water into a basin.
- Add 28 g of salt and mix well. If you don’t have an electronic weighing scale, simply add 2 tablespoon of salt (1 tbsp = 15 ml).
- Pour in clams.
- Leave the soaked clams in the fridge for up to two days. During this time, the clams will choke out the sand. The longer you can keep it, the cleaner it is.
- Pour away dark, sandy water. With your hands, move clams into another basin. Do not pour into another basin, otherwise you are pouring the sand back into the clams. You’ll see more sandy residue in the main basin. Repeat until water is clear.
OTHER NOTES
- Soaking the clams for two days, to me, is too long. However, it is said that the longer you soak, the cleaner it’ll be. I merely tried 24 hours
- Check out this recipe Easy Clam Soup